建立巢狀導覽流程
應用程式隨著時間推移會累積數十甚至數百條路由。您的一些路由適合作為頂層(全域)路由。例如,"/"、"profile"、"contact"、"social_feed" 都是您的應用程式中可能的頂層路由。但是,想像一下,您在頂層的 Navigator 小工具中定義了所有可能的路由。清單會非常長,而且許多這些路由最好在另一個小工具中巢狀處理。
考慮一個用於無線燈泡的物聯網 (IoT) 設定流程,您可以使用應用程式控制該燈泡。此設定流程包含 4 個頁面:尋找附近的燈泡、選擇您要新增的燈泡、新增燈泡,然後完成設定。您可以從頂層的 Navigator 小工具協調此行為。然而,在 SetupFlow 小工具中定義第二個巢狀的 Navigator 小工具,並讓巢狀的 Navigator 擁有設定流程中 4 個頁面的所有權,這樣做更有意義。這種導航委派有助於更大的本地控制,這在開發軟體時通常更可取。
以下動畫顯示應用程式的行為
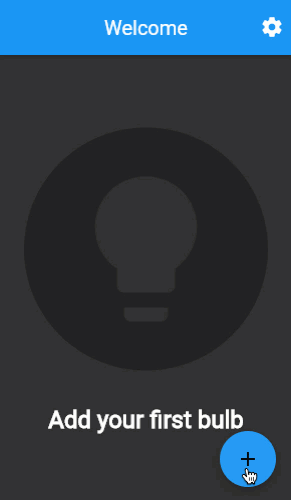
在此範例中,您將實作一個四頁的物聯網設定流程,該流程在頂層 Navigator 小工具下方維護其自己的巢狀導航。
準備導覽
#這個物聯網應用程式有兩個頂層畫面,以及設定流程。將這些路由名稱定義為常數,以便可以在程式碼中引用它們。
const routeHome = '/';
const routeSettings = '/settings';
const routePrefixDeviceSetup = '/setup/';
const routeDeviceSetupStart = '/setup/$routeDeviceSetupStartPage';
const routeDeviceSetupStartPage = 'find_devices';
const routeDeviceSetupSelectDevicePage = 'select_device';
const routeDeviceSetupConnectingPage = 'connecting';
const routeDeviceSetupFinishedPage = 'finished';
首頁和設定畫面以靜態名稱引用。然而,設定流程頁面使用兩個路徑來建立其路由名稱:一個 /setup/ 字首,後跟特定頁面的名稱。透過組合這兩個路徑,您的 Navigator 可以確定路由名稱適用於設定流程,而無需識別與設定流程關聯的所有個別頁面。
頂層 Navigator 不負責識別個別的設定流程頁面。因此,您的頂層 Navigator 需要剖析傳入的路由名稱以識別設定流程字首。需要剖析路由名稱表示您無法使用頂層 Navigator 的 routes 屬性。相反地,您必須為 onGenerateRoute 屬性提供一個函式。
實作 onGenerateRoute 以針對三個頂層路徑中的每個路徑傳回適當的小工具。
onGenerateRoute: (settings) {
  final Widget page;
  if (settings.name == routeHome) {
    page = const HomeScreen();
  } else if (settings.name == routeSettings) {
    page = const SettingsScreen();
  } else if (settings.name!.startsWith(routePrefixDeviceSetup)) {
    final subRoute =
        settings.name!.substring(routePrefixDeviceSetup.length);
    page = SetupFlow(
      setupPageRoute: subRoute,
    );
  } else {
    throw Exception('Unknown route: ${settings.name}');
  }

  return MaterialPageRoute<dynamic>(
    builder: (context) {
      return page;
    },
    settings: settings,
  );
},
請注意,首頁和設定路由與確切的路由名稱匹配。然而,設定流程路由條件僅檢查字首。如果路由名稱包含設定流程字首,則會忽略路由名稱的其餘部分,並將其傳遞給 SetupFlow 小工具進行處理。這種路由名稱的分割使得頂層 Navigator 可以對設定流程中的各種子路由保持不可知。
建立一個名為 SetupFlow 的狀態小工具,該小工具接受一個路由名稱。
class SetupFlow extends StatefulWidget {
  const SetupFlow({
    super.key,
    required this.setupPageRoute,
  });

  final String setupPageRoute;

  @override
  State<SetupFlow> createState() => SetupFlowState();
}

class SetupFlowState extends State<SetupFlow> {
  //...
}
顯示設定流程的應用程式列
#設定流程會顯示一個在所有頁面上都會顯示的持續應用程式列。
從 SetupFlow 小工具的 build() 方法傳回一個 Scaffold 小工具,並包含所需的 AppBar 小工具。
@override
Widget build(BuildContext context) {
  return Scaffold(
    appBar: _buildFlowAppBar(),
    body: const SizedBox(),
  );
}

PreferredSizeWidget _buildFlowAppBar() {
  return AppBar(
    title: const Text('Bulb Setup'),
  );
}
當按下返回箭頭時,應用程式列會顯示一個返回箭頭並退出設定流程。但是,退出流程會導致使用者失去所有進度。因此,系統會提示使用者確認是否要退出設定流程。
提示使用者確認退出設定流程,並確保在使用者按下 Android 上的硬體返回按鈕時會出現提示。
Future<void> _onExitPressed() async {
  final isConfirmed = await _isExitDesired();

  if (isConfirmed && mounted) {
    _exitSetup();
  }
}

Future<bool> _isExitDesired() async {
  return await showDialog<bool>(
          context: context,
          builder: (context) {
            return AlertDialog(
              title: const Text('Are you sure?'),
              content: const Text(
                  'If you exit device setup, your progress will be lost.'),
              actions: [
                TextButton(
                  onPressed: () {
                    Navigator.of(context).pop(true);
                  },
                  child: const Text('Leave'),
                ),
                TextButton(
                  onPressed: () {
                    Navigator.of(context).pop(false);
                  },
                  child: const Text('Stay'),
                ),
              ],
            );
          }) ??
      false;
}

void _exitSetup() {
  Navigator.of(context).pop();
}

@override
Widget build(BuildContext context) {
  return PopScope(
    canPop: false,
    onPopInvokedWithResult: (didPop, _) async {
      if (didPop) return;

      if (await _isExitDesired() && context.mounted) {
        _exitSetup();
      }
    },
    child: Scaffold(
      appBar: _buildFlowAppBar(),
      body: const SizedBox(),
    ),
  );
}

PreferredSizeWidget _buildFlowAppBar() {
  return AppBar(
    leading: IconButton(
      onPressed: _onExitPressed,
      icon: const Icon(Icons.chevron_left),
    ),
    title: const Text('Bulb Setup'),
  );
}
當使用者點擊應用程式列中的返回箭頭,或按下 Android 上的返回按鈕時,會彈出一個警示對話方塊,以確認使用者是否要離開設定流程。如果使用者按下離開,則設定流程會將自己從頂層導航堆疊中彈出。如果使用者按下留下,則會忽略該動作。
您可能會注意到 離開 和 留下 按鈕都會調用 Navigator.pop()。明確來說,這個 pop() 動作會將警示對話方塊從導航堆疊中彈出,而不是設定流程。
產生巢狀路由
#設定流程的工作是在流程中顯示適當的頁面。
將一個 Navigator 小工具新增到 SetupFlow,並實作 onGenerateRoute 屬性。
final _navigatorKey = GlobalKey<NavigatorState>();

void _onDiscoveryComplete() {
  _navigatorKey.currentState!.pushNamed(routeDeviceSetupSelectDevicePage);
}

void _onDeviceSelected(String deviceId) {
  _navigatorKey.currentState!.pushNamed(routeDeviceSetupConnectingPage);
}

void _onConnectionEstablished() {
  _navigatorKey.currentState!.pushNamed(routeDeviceSetupFinishedPage);
}

@override
Widget build(BuildContext context) {
  return PopScope(
    canPop: false,
    onPopInvokedWithResult: (didPop, _) async {
      if (didPop) return;

      if (await _isExitDesired() && context.mounted) {
        _exitSetup();
      }
    },
    child: Scaffold(
      appBar: _buildFlowAppBar(),
      body: Navigator(
        key: _navigatorKey,
        initialRoute: widget.setupPageRoute,
        onGenerateRoute: _onGenerateRoute,
      ),
    ),
  );
}

Route<Widget> _onGenerateRoute(RouteSettings settings) {
  final page = switch (settings.name) {
    routeDeviceSetupStartPage => WaitingPage(
        message: 'Searching for nearby bulb...',
        onWaitComplete: _onDiscoveryComplete,
      ),
    routeDeviceSetupSelectDevicePage => SelectDevicePage(
        onDeviceSelected: _onDeviceSelected,
      ),
    routeDeviceSetupConnectingPage => WaitingPage(
        message: 'Connecting...',
        onWaitComplete: _onConnectionEstablished,
      ),
    routeDeviceSetupFinishedPage => FinishedPage(
        onFinishPressed: _exitSetup,
      ),
    _ => throw StateError('Unexpected route name: ${settings.name}!')
  };

  return MaterialPageRoute(
    builder: (context) {
      return page;
    },
    settings: settings,
  );
}
_onGenerateRoute 函式的工作方式與頂層 Navigator 相同。一個 RouteSettings 物件會傳遞到該函式中,其中包含路由的 name。根據該路由名稱,會傳回四個流程頁面之一。
第一個頁面稱為 find_devices,它會等待幾秒鐘以模擬網路掃描。在等待期間之後,該頁面會調用其回呼。在此範例中,該回呼是 _onDiscoveryComplete。設定流程會識別到,當裝置探索完成時,應顯示裝置選擇頁面。因此,在 _onDiscoveryComplete 中,_navigatorKey 會指示巢狀 Navigator 導航至 select_device 頁面。
select_device 頁面要求使用者從可用裝置清單中選擇一個裝置。在此範例中,僅向使用者呈現一個裝置。當使用者點擊裝置時,會調用 onDeviceSelected 回呼。設定流程會識別到,當選擇裝置時,應顯示連線頁面。因此,在 _onDeviceSelected 中,_navigatorKey 會指示巢狀 Navigator 導航至 "connecting" 頁面。
connecting 頁面的工作方式與 find_devices 頁面相同。connecting 頁面會等待幾秒鐘,然後調用其回呼。在此範例中,該回呼是 _onConnectionEstablished。設定流程會識別到,當建立連線時,應顯示最後一個頁面。因此,在 _onConnectionEstablished 中,_navigatorKey 會指示巢狀 Navigator 導航至 finished 頁面。
finished 頁面為使用者提供一個完成按鈕。當使用者點擊完成時,會調用 _exitSetup 回呼,該回呼會將整個設定流程從頂層 Navigator 堆疊中彈出,將使用者帶回首頁。
恭喜!您已實作具有四個子路由的巢狀導航。
互動式範例
#執行應用程式
- 在新增您的第一個燈泡畫面中,點擊 FAB,以加號 + 顯示。這會將您帶到選擇附近的裝置畫面。列出一個燈泡。
- 點擊列出的燈泡。會出現一個已完成!畫面。
- 點擊已完成按鈕以返回第一個畫面。
import 'package:flutter/material.dart';

const routeHome = '/';
const routeSettings = '/settings';
const routePrefixDeviceSetup = '/setup/';
const routeDeviceSetupStart = '/setup/$routeDeviceSetupStartPage';
const routeDeviceSetupStartPage = 'find_devices';
const routeDeviceSetupSelectDevicePage = 'select_device';
const routeDeviceSetupConnectingPage = 'connecting';
const routeDeviceSetupFinishedPage = 'finished';

void main() {
  runApp(
    MaterialApp(
      theme: ThemeData(
        brightness: Brightness.dark,
        appBarTheme: const AppBarTheme(
          backgroundColor: Colors.blue,
        ),
        floatingActionButtonTheme: const FloatingActionButtonThemeData(
          backgroundColor: Colors.blue,
        ),
      ),
      onGenerateRoute: (settings) {
        final Widget page;
        if (settings.name == routeHome) {
          page = const HomeScreen();
        } else if (settings.name == routeSettings) {
          page = const SettingsScreen();
        } else if (settings.name!.startsWith(routePrefixDeviceSetup)) {
          final subRoute =
              settings.name!.substring(routePrefixDeviceSetup.length);
          page = SetupFlow(
            setupPageRoute: subRoute,
          );
        } else {
          throw Exception('Unknown route: ${settings.name}');
        }

        return MaterialPageRoute<dynamic>(
          builder: (context) {
            return page;
          },
          settings: settings,
        );
      },
      debugShowCheckedModeBanner: false,
    ),
  );
}

@immutable
class SetupFlow extends StatefulWidget {
  static SetupFlowState of(BuildContext context) {
    return context.findAncestorStateOfType<SetupFlowState>()!;
  }

  const SetupFlow({
    super.key,
    required this.setupPageRoute,
  });

  final String setupPageRoute;

  @override
  SetupFlowState createState() => SetupFlowState();
}

class SetupFlowState extends State<SetupFlow> {
  final _navigatorKey = GlobalKey<NavigatorState>();

  @override
  void initState() {
    super.initState();
  }

  void _onDiscoveryComplete() {
    _navigatorKey.currentState!.pushNamed(routeDeviceSetupSelectDevicePage);
  }

  void _onDeviceSelected(String deviceId) {
    _navigatorKey.currentState!.pushNamed(routeDeviceSetupConnectingPage);
  }

  void _onConnectionEstablished() {
    _navigatorKey.currentState!.pushNamed(routeDeviceSetupFinishedPage);
  }

  Future<void> _onExitPressed() async {
    final isConfirmed = await _isExitDesired();

    if (isConfirmed && mounted) {
      _exitSetup();
    }
  }

  Future<bool> _isExitDesired() async {
    return await showDialog<bool>(
            context: context,
            builder: (context) {
              return AlertDialog(
                title: const Text('Are you sure?'),
                content: const Text(
                    'If you exit device setup, your progress will be lost.'),
                actions: [
                  TextButton(
                    onPressed: () {
                      Navigator.of(context).pop(true);
                    },
                    child: const Text('Leave'),
                  ),
                  TextButton(
                    onPressed: () {
                      Navigator.of(context).pop(false);
                    },
                    child: const Text('Stay'),
                  ),
                ],
              );
            }) ??
        false;
  }

  void _exitSetup() {
    Navigator.of(context).pop();
  }

  @override
  Widget build(BuildContext context) {
    return PopScope(
      canPop: false,
      onPopInvokedWithResult: (didPop, _) async {
        if (didPop) return;

        if (await _isExitDesired() && context.mounted) {
          _exitSetup();
        }
      },
      child: Scaffold(
        appBar: _buildFlowAppBar(),
        body: Navigator(
          key: _navigatorKey,
          initialRoute: widget.setupPageRoute,
          onGenerateRoute: _onGenerateRoute,
        ),
      ),
    );
  }

  Route<Widget> _onGenerateRoute(RouteSettings settings) {
    final page = switch (settings.name) {
      routeDeviceSetupStartPage => WaitingPage(
          message: 'Searching for nearby bulb...',
          onWaitComplete: _onDiscoveryComplete,
        ),
      routeDeviceSetupSelectDevicePage => SelectDevicePage(
          onDeviceSelected: _onDeviceSelected,
        ),
      routeDeviceSetupConnectingPage => WaitingPage(
          message: 'Connecting...',
          onWaitComplete: _onConnectionEstablished,
        ),
      routeDeviceSetupFinishedPage => FinishedPage(
          onFinishPressed: _exitSetup,
        ),
      _ => throw StateError('Unexpected route name: ${settings.name}!')
    };

    return MaterialPageRoute(
      builder: (context) {
        return page;
      },
      settings: settings,
    );
  }

  PreferredSizeWidget _buildFlowAppBar() {
    return AppBar(
      leading: IconButton(
        onPressed: _onExitPressed,
        icon: const Icon(Icons.chevron_left),
      ),
      title: const Text('Bulb Setup'),
    );
  }
}

class SelectDevicePage extends StatelessWidget {
  const SelectDevicePage({
    super.key,
    required this.onDeviceSelected,
  });

  final void Function(String deviceId) onDeviceSelected;

  @override
  Widget build(BuildContext context) {
    return Scaffold(
      body: Center(
        child: Padding(
          padding: const EdgeInsets.symmetric(horizontal: 24),
          child: Column(
            mainAxisSize: MainAxisSize.min,
            children: [
              Text(
                'Select a nearby device:',
                style: Theme.of(context).textTheme.titleLarge,
              ),
              const SizedBox(height: 24),
              SizedBox(
                width: double.infinity,
                height: 54,
                child: ElevatedButton(
                  style: ButtonStyle(
                    backgroundColor: WidgetStateColor.resolveWith((states) {
                      return const Color(0xFF222222);
                    }),
                  ),
                  onPressed: () {
                    onDeviceSelected('22n483nk5834');
                  },
                  child: const Text(
                    'Bulb 22n483nk5834',
                    style: TextStyle(
                      fontSize: 24,
                    ),
                  ),
                ),
              ),
            ],
          ),
        ),
      ),
    );
  }
}

class WaitingPage extends StatefulWidget {
  const WaitingPage({
    super.key,
    required this.message,
    required this.onWaitComplete,
  });

  final String message;
  final VoidCallback onWaitComplete;

  @override
  State<WaitingPage> createState() => _WaitingPageState();
}

class _WaitingPageState extends State<WaitingPage> {
  @override
  void initState() {
    super.initState();
    _startWaiting();
  }

  Future<void> _startWaiting() async {
    await Future<dynamic>.delayed(const Duration(seconds: 3));

    if (mounted) {
      widget.onWaitComplete();
    }
  }

  @override
  Widget build(BuildContext context) {
    return Scaffold(
      body: Center(
        child: Padding(
          padding: const EdgeInsets.symmetric(horizontal: 24),
          child: Column(
            mainAxisSize: MainAxisSize.min,
            children: [
              const CircularProgressIndicator(),
              const SizedBox(height: 32),
              Text(widget.message),
            ],
          ),
        ),
      ),
    );
  }
}

class FinishedPage extends StatelessWidget {
  const FinishedPage({
    super.key,
    required this.onFinishPressed,
  });

  final VoidCallback onFinishPressed;

  @override
  Widget build(BuildContext context) {
    return Scaffold(
      body: Center(
        child: Padding(
          padding: const EdgeInsets.symmetric(horizontal: 24),
          child: SingleChildScrollView(
            child: Column(
              mainAxisSize: MainAxisSize.min,
              children: [
                Container(
                  width: 200,
                  height: 200,
                  decoration: const BoxDecoration(
                    shape: BoxShape.circle,
                    color: Color(0xFF222222),
                  ),
                  child: const Center(
                    child: Icon(
                      Icons.lightbulb,
                      size: 140,
                      color: Colors.white,
                    ),
                  ),
                ),
                const SizedBox(height: 32),
                const Text(
                  'Bulb added!',
                  textAlign: TextAlign.center,
                  style: TextStyle(
                    fontSize: 24,
                    fontWeight: FontWeight.bold,
                  ),
                ),
                const SizedBox(height: 32),
                ElevatedButton(
                  style: ButtonStyle(
                    padding: WidgetStateProperty.resolveWith((states) {
                      return const EdgeInsets.symmetric(
                          horizontal: 24, vertical: 12);
                    }),
                    backgroundColor: WidgetStateColor.resolveWith((states) {
                      return const Color(0xFF222222);
                    }),
                    shape: WidgetStateProperty.resolveWith((states) {
                      return const StadiumBorder();
                    }),
                  ),
                  onPressed: onFinishPressed,
                  child: const Text(
                    'Finish',
                    style: TextStyle(
                      fontSize: 24,
                    ),
                  ),
                ),
              ],
            ),
          ),
        ),
      ),
    );
  }
}

@immutable
class HomeScreen extends StatelessWidget {
  const HomeScreen({
    super.key,
  });

  @override
  Widget build(BuildContext context) {
    return Scaffold(
      appBar: _buildAppBar(context),
      body: Center(
        child: Padding(
          padding: const EdgeInsets.symmetric(horizontal: 24),
          child: Column(
            mainAxisSize: MainAxisSize.min,
            children: [
              Container(
                width: 200,
                height: 200,
                decoration: const BoxDecoration(
                  shape: BoxShape.circle,
                  color: Color(0xFF222222),
                ),
                child: Center(
                  child: Icon(
                    Icons.lightbulb,
                    size: 140,
                    color: Theme.of(context).scaffoldBackgroundColor,
                  ),
                ),
              ),
              const SizedBox(height: 32),
              const Text(
                'Add your first bulb',
                textAlign: TextAlign.center,
                style: TextStyle(
                  fontSize: 24,
                  fontWeight: FontWeight.bold,
                ),
              ),
            ],
          ),
        ),
      ),
      floatingActionButton: FloatingActionButton(
        onPressed: () {
          Navigator.of(context).pushNamed(routeDeviceSetupStart);
        },
        child: const Icon(Icons.add),
      ),
    );
  }

  PreferredSizeWidget _buildAppBar(BuildContext context) {
    return AppBar(
      title: const Text('Welcome'),
      actions: [
        IconButton(
          icon: const Icon(Icons.settings),
          onPressed: () {
            Navigator.pushNamed(context, routeSettings);
          },
        ),
      ],
    );
  }
}

class SettingsScreen extends StatelessWidget {
  const SettingsScreen({
    super.key,
  });

  @override
  Widget build(BuildContext context) {
    return Scaffold(
      appBar: _buildAppBar(),
      body: SingleChildScrollView(
        child: Column(
          mainAxisSize: MainAxisSize.min,
          children: List.generate(8, (index) {
            return Container(
              width: double.infinity,
              height: 54,
              margin: const EdgeInsets.only(left: 16, right: 16, top: 16),
              decoration: BoxDecoration(
                borderRadius: BorderRadius.circular(8),
                color: const Color(0xFF222222),
              ),
            );
          }),
        ),
      ),
    );
  }

  PreferredSizeWidget _buildAppBar() {
    return AppBar(
      title: const Text('Settings'),
    );
  }
}
除非另有說明,否則本網站上的文件反映了 Flutter 的最新穩定版本。頁面最後更新於 2024-10-14。 檢視原始碼 或 回報問題。