焦點和文字欄位
當文字欄位被選取並接受輸入時,據說它具有「焦點」。一般而言,使用者會透過點擊將焦點移至文字欄位,而開發人員則透過使用此食譜中描述的工具以程式設計方式將焦點移至文字欄位。
管理焦點是建立具有直觀流程表單的基本工具。例如,假設您有一個帶有文字欄位的搜尋畫面。當使用者導覽至搜尋畫面時,您可以將焦點設定在搜尋詞的文字欄位上。這允許使用者在畫面可見時立即開始輸入,而無需手動點擊文字欄位。
在本食譜中,您將學習如何在文字欄位可見時立即將焦點給予它,以及如何在點擊按鈕時將焦點給予文字欄位。
在文字欄位可見時立即將其設為焦點
#要讓文字欄位在可見時立即獲得焦點,請使用 autofocus 屬性。
TextField(
  autofocus: true,
);如需更多關於處理輸入和建立文字欄位的資訊,請參閱食譜中的表單章節。
在點擊按鈕時將焦點設為文字欄位
#您可能需要在稍後的時間點才將焦點轉移到特定的文字欄位,而不是立即轉移。在現實世界中,您可能還需要根據 API 呼叫或驗證錯誤來將焦點轉移到特定的文字欄位。在本範例中,請按照以下步驟在使用者按下按鈕後將焦點給予文字欄位
- 建立一個
FocusNode。 - 將
FocusNode傳遞給TextField。 - 在點擊按鈕時將焦點給予
TextField。
1. 建立一個 FocusNode
#首先,建立一個FocusNode。使用 FocusNode 來識別 Flutter「焦點樹」中的特定 TextField。這允許您在接下來的步驟中將焦點給予該 TextField。
由於焦點節點是生命週期較長的物件,請使用 State 物件管理其生命週期。使用以下說明在 State 類別的 initState() 方法內建立 FocusNode 實例,並在 dispose() 方法中清理它
// Define a custom Form widget.
class MyCustomForm extends StatefulWidget {
  const MyCustomForm({super.key});

  @override
  State<MyCustomForm> createState() => _MyCustomFormState();
}

// Define a corresponding State class.
// This class holds data related to the form.
class _MyCustomFormState extends State<MyCustomForm> {
  // Define the focus node. To manage the lifecycle, create the FocusNode in
  // the initState method, and clean it up in the dispose method.
  late FocusNode myFocusNode;

  @override
  void initState() {
    super.initState();

    myFocusNode = FocusNode();
  }

  @override
  void dispose() {
    // Clean up the focus node when the Form is disposed.
    myFocusNode.dispose();

    super.dispose();
  }

  @override
  Widget build(BuildContext context) {
    // Fill this out in the next step.
  }
}
2. 將 FocusNode 傳遞給 TextField
#現在您有了 FocusNode,將它傳遞給 build() 方法中的特定 TextField。
@override
Widget build(BuildContext context) {
  return TextField(
    focusNode: myFocusNode,
  );
}
3. 在點擊按鈕時將焦點給予 TextField
#最後,在使用者點擊浮動操作按鈕時,將焦點設定到文字欄位。使用requestFocus()方法來執行此任務。
FloatingActionButton(
  // When the button is pressed,
  // give focus to the text field using myFocusNode.
  onPressed: () => myFocusNode.requestFocus(),
),
互動式範例
#import 'package:flutter/material.dart';
void main() => runApp(const MyApp());
class MyApp extends StatelessWidget {
const MyApp({super.key});
@override
Widget build(BuildContext context) {
return const MaterialApp(
title: 'Text Field Focus',
home: MyCustomForm(),
);
}
}
// Define a custom Form widget.
class MyCustomForm extends StatefulWidget {
const MyCustomForm({super.key});
@override
State<MyCustomForm> createState() => _MyCustomFormState();
}
// Define a corresponding State class.
// This class holds data related to the form.
class _MyCustomFormState extends State<MyCustomForm> {
// Define the focus node. To manage the lifecycle, create the FocusNode in
// the initState method, and clean it up in the dispose method.
late FocusNode myFocusNode;
@override
void initState() {
super.initState();
myFocusNode = FocusNode();
}
@override
void dispose() {
// Clean up the focus node when the Form is disposed.
myFocusNode.dispose();
super.dispose();
}
@override
Widget build(BuildContext context) {
return Scaffold(
appBar: AppBar(
title: const Text('Text Field Focus'),
),
body: Padding(
padding: const EdgeInsets.all(16),
child: Column(
children: [
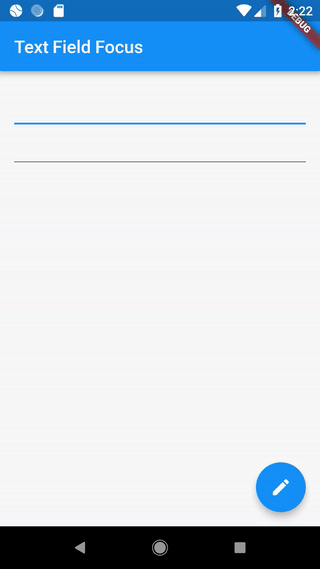
// The first text field is focused on as soon as the app starts.
const TextField(
autofocus: true,
),
// The second text field is focused on when a user taps the
// FloatingActionButton.
TextField(
focusNode: myFocusNode,
),
],
),
),
floatingActionButton: FloatingActionButton(
// When the button is pressed,
// give focus to the text field using myFocusNode.
onPressed: () => myFocusNode.requestFocus(),
tooltip: 'Focus Second Text Field',
child: const Icon(Icons.edit),
), // This trailing comma makes auto-formatting nicer for build methods.
);
}
}
除非另有說明,否則本網站上的文件反映了 Flutter 的最新穩定版本。頁面上次更新於 2024-06-26。 檢視原始碼 或 回報問題。